Best Top Coat for Painted Countertops – Buyer’s Guide
 Creating your own countertops seems like fun at first glance, but there are a few steps to take care of before delving into the project. Between the right kind of materials to use and the size you need, it takes getting an idea of exactly how you want your countertops to look.
One of the more crucial necessities includes the coats to add; the variants provide some differences worth looking into, especially for anyone that is new to understanding how top coats work.
Even so, delving into the topic should not be so much of a hassle, and it’s worth a shot just to see which coat works the best. In short, you can get an idea of the methods that coats use to protect countertops as you look over their durability, quality, and applicability.
Everyone else may have their own view on what’s deemed the best top coat for painted countertops, but this list should provide a good sample of information to describe how each method prevents countertops from damage done by sunlight, fading, or stains, all of which matter for those in need of keeping everything looking new.
| Product | Features |
|---|---|
| General Finishes Water Based Topcoat |
|
| Minwax 63000 Fast Drying Polyurethane |
|
| Minwaxc Polycrylic Protective Finishes |
|
| Rust-Oleum 200241H Varathane Ultimate Polyurethane |
|
| ProMarine Epoxy Resin |
|
| East Coast Resin Crystal Clear |
|
| MAS Crystal Clear Epoxy Resin |
|
Top 7 Best Top Coat for Painted Countertops in Dec, 2025
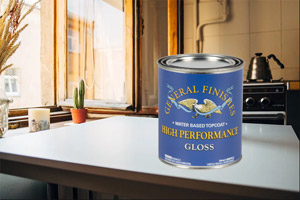
1. General Finishes QTHF High-Performance Water Based Topcoat

For simplicity’s sake, we’ll take a look at the option with the 1-quart size and the flat variant.
This water-based topcoat is one of the more long-lasting options for those who want to have a sheen that remains on, regardless of the use of the item.
The polyurethane material made within the coat has a UV stabilizer that prevents sunlight or any weather from harming the sheen. The General Finishes brand works well with painted countertops, the likes of which rely on protection from stains or fading.
Pros
- Coats last very long,
- Stain-proof,
- Works on floors.
Cons
- Does not go well with white paint.
2. Minwax 63000 Fast Drying Polyurethane Clear Gloss

The Clear Gloss topcoat leaves a gorgeous shine across painted countertops made for a home’s interior, whether it’s a desk, a cabinet, any furniture across the home, or even the doors (excluding ones that serve as the exits of the home). The coating also works for either finished or unfinished wood.
The durability of the coating keeps stains and other dents from ruining the furniture, and it can dry quickly after it’s applied.
Pros
- Dries quickly,
- Goes well on either finished or unfinished wood,
- Perfect for interior items.
Cons
- Not for exterior furniture,
- Certain doors don’t go with it.
3. Minwax Polycrylic Water-Based Protective Finishes

As this coat is water-based, cleaning painted countertops with regular water won’t damage the finish. The finish won’t release a bad odor, nor will it yellow the furniture of your house.
Additionally, this coat won’t take time to dry, regardless of its finish type.
Pros
- Dries fast,
- Perfect for interior items.
Cons
- Yellows on shelves with paint.
4. Rust-Oleum 200241H Water-Based Polyurethane

It’s able to protect your painted countertops (as well as other projects), and it can keep stains and scratches from developing, even after it finishes drying. Also, the Satin formula shine adds a natural look to the surface of the wood.
Pros
- Dries quickly,
- Goes well on either finished or unfinished wood,
- Makes the surface look a lot more natural.
Cons
- Not for exterior furniture.
5. ProMarine Crystal Clear Bar Table Top Epoxy Resin Coating For Wood Table top

They both are made for painted countertops and any substance made of wood. Crystal Clear is resistant to sunlight, and it removes any craters that were originally left on the surface.
Pros
- Dries in no time,
- Perfect for interior items,
- Leaves a smooth surface and shine.
Cons
- Not for exterior furniture,
- Not available in other sizes.
6. East Coast EPOXY Resin Crystal Clear 1 Gallon Kit – for Super Gloss Coating and TABLETOPS

This set consists of some of the best methods for removing any crawling or trickling, as well as giving shine to painted countertops.
The epoxy resin from both gallons are resistant to sunlight, damage done by scratches or dents, and spills, a trait many brands similar to this follow with intent; this kit could work for those that are interested in keeping their painted countertops as durable as possible.
Pros
- Dries quickly,
- Goes well on a large number of items require a sheen,
- Perfect for interior items,
- Easy for customers to use.
Cons
- Not for exterior furniture,
- Not available in other sizes.
7. MAS Crystal Clear Epoxy Resin One Gallon Kit

Those that do want to have more items included with their kits will see this as a worthwhile option for the enthusiasts that want to make their painted countertops look new.
The epoxies are simple to work with, and they are able to add more sheen to the materials they’re put on, with consistency being a key aspect of the brand’s end goal. Additionally, the company’s trait of creating everything in the United States of America is one of their prouder moments.
In all seriousness, the gloss left from Table Top Pro will never fail at leaving a gorgeous look to the finish, and the inclusion of the spreader and brush eases the difficulty of going into some of the deeper parts of any DIY project from start to finish. Whether it’s the aforementioned tabletop surface, or if the project requires the material to be added on resin art, the wonders of the kit are endless.
Pros
- Drying speed is quick,
- Goes well on a plethora of surfaces,
- Includes brusher and spreader.
Cons
- Sizes are limited.
Top Coat for Painted Countertops – Buyer’s Guide
This is a reference for those that want to know about the differences between the coatings mentioned on the list, as well as basic information on what needs to be done when applying the coating, understanding durability, best surfaces for each type, and the negatives they present.
Types of coatings for painted countertops
- Polyurethane: It should be noted that this kind of coating comes in either water-based or oil-based variants. Ones that are water-based make the finish look a lot clearer and less odor after applying the polyurethane.
It takes about two or three hours to get the coating done, and your tools can work with water to get the process done with 4 coats. Said coats will look natural, as they add more to the surface texture of your projects. It’s a lot more expensive and consists of 35% solids.
- Oil-based polyurethanes need fewer coats, but they do leave an amber glow instead. They take a lot longer to dry, and they leave an odor, which means that it’s recommended not to step in the area for an extended period of time.
Even so, your projects can have a nicely done glow at the end. They can remain a lot more affordable as one of their positives, and they consist of 45% solids. The biggest drawback to using them is that they’re likely to leave a yellow tint on surfaces with lighter colors, so they’re better used only on darker colors.
- Epoxy: Another kind of topcoat in the market, this is a lot faster to work with compared to its polyurethane counterparts.
Additionally, they are not meant to be used for outdoor furniture due to the risk of having the items yellow from UV exposure. There are other issues with epoxy, such as bubble susceptibility and heat tolerances. Additionally, it does not turn yellow, is compatible with any painted surfaces, fills irregularities, durable and environmentally friendly after hardening. You can add paints to the epoxy for an amazing look.
How many layers do you need to apply?
It depends on the kind of material you are working with.
- With water-based polyurethanes, all that matters is doing the work for at least 4 hours and make sure the four coats are applied nicely.
- Oil-based polyurethanes require more time, and no one can step into the areas that a project is worked on, even when there are fewer coats needed.
- Epoxy resin requires only a bit of work to be put into the coats to make sure they remain perfect before they dry.
Some tips to apply polyurethane
This is a bit of advice for some that are new to the project. In terms of water-based polyurethane, it’s recommended to be sure the mix is done right, especially given how often a project will be given coats.
Afterward, the next thing to do is to leave the material to dry for an extended period of time. As for polyurethane that is oil-based, it needs a good amount of mixing before it’s applied, and it should take longer for the coats to dry.
Epoxy Resin Vs. Polyurethane
Here is a comparison between the three materials:
In terms of the finish, water-based polyurethanes are a lot clearer, oil-based polyurethanes leave off an amber glow, and epoxy resin tends to look more reflective. Regarding the odor, water-based polyurethanes have less odor left from applying from handling the substance, oil-based leaves a strong odor, and epoxy resin can go from either harmless to poisonous, depending on the type used.
As for the coating amount, it’ll take:
- 4 coats for water-based,
- 2 with oil-based,
- and 2 for epoxy resin.
Depending on the surface you’re working on, some of the coats will likely cause the projects to yellow from either applying it on the surface with a poor batch or if it’s not supposed to be put on there.
Also, there is more to check on with epoxy resin than there would be with the other topcoats. They include things such as heat tolerances or bubbles.
A final trait of the material is the necessity to prevent any scratches from developing during the coating, which requires using tools to keep everything finely done during the process.
Frequently Asked Questions
How long do bottles last?
It depends on the amount of work you do with your projects. If it’s a tabletop or a specific project that’s not too massive, then the bottle should last a good while. If it’s a much larger table or surface, then a bottle would have most of the liquid used for as much as half or more than expected. Additionally, it also depends on the size of the bottle or can that you have, where smaller cans are likely to have the liquid deplete while larger mixes won’t have such an issue.
When should I apply more coating again?
Another set of coating will be needed every quarter or half a year, though this solely depends on the wear and tear the item receives from people using it or moving other items around the project. Look at the first FAQ regarding whether or not you’d have enough for a new project depending on the quantity remaining (bottle/can size is also put into consideration).
Where’s the best place to apply the topcoat?
It’s best to apply your top coat on a project away from sunlight to have better results, even if it’s an item that may normally be outside. The temperatures of the outdoors and the weather may limit what you are trying to do.
Can any topcoat be freezable/flammable?
If a topcoat freezes more than three times, then it cannot reform. As for its flammability, it’s able to withstand heat on some items that generally become warm from use.
Should there be any preparation done before the topcoat is applied?
It’s recommended to clean your projects before applying the topcoat. Wax is not recommended due to it affecting the adherence of the topcoat, though other cleaning products are perfectly fine.
How to handle imperfections already found before the application of the topcoat?
The application of the topcoat can further reveal the imperfections more than they were before the topcoat was added. This can help you remove said imperfections while adding your coats.
What is the best way to remove the topcoat?
Use solvents that are aliphatic, aromatic, or even an Isopropyl Alcohol with a high concentration to remove the coat; it’s advised to keep in mind how many coats were added before the process begins, as the thickness of each coat and the amount will add more time to your removal process.
Is it recommended to sand the surface of a painted tabletop before and between the application of the topcoat layers?
Yes, it is recommended to sand the surface of a painted countertop before you apply the topcoat layers. Doing so helps make the surface rougher and shine-free, so the layers apply better during the process, though the dust left from the sanding must be removed with either paint thinner or mineral spirits.
After the first two coats are done, you should also lightly sand the current polyurethane before adding the next two coats, so those can adhere to the ones already applied. This is a process that should be done every six months to help protect the sheen and keep it new.
Conclusion
With everything previously mentioned, laid out in one long but effective referential page, you should get a clear understanding of how top coats work, what versions are available, the differences between the options presented, and the variants that some brands focus on.
Overall, the many choices for epoxy or polyurethane mixes should not be a discouragement for anyone that wants to begin their DIY projects or give some great shine to their painted countertops. If they find a product that’s easy for them to use, or if they find the right item to add for their surfaces, then they should have nothing else to worry about.